We left the last installment with a basic structure for our application, ready for development. I guess this is a good time to state our goals for this project and how we will develop moving forward. The approach we will be taking is test driven development. That means writing tests first that fail, and then adding the implementation which allows the tests to pass. We will be developing in incremental steps, so for each feature we’ll start with the very basics and then add to these as we go. The goal for this project is for me to give something back to the Castle community and to improve my skills. I’m no TDD expert and so this will be a learning experience for me too. So, if you spot a problem with what I am doing, feel free to add your comments. Who knows, we might end up with a pretty good product in it’s own right that we can all use. Cool!
Now, down to business. We’ll start by creating our first unit test. We’re going to be using the built-in support for unit testing that MonoRail supplies via the BaseControllerTest class and the MbUnit unit testing framework.
We’ll start by adding a test for the “New Issue” page. This will be the page where users will be able to create new bugs/feature requests/tasks etc. These will be called “Issues” as a grouping name. So we’ll need an “Issue” controller and that should have a New() action. Calling the New() action should render the correct view. So, here is our first test (click for full size):

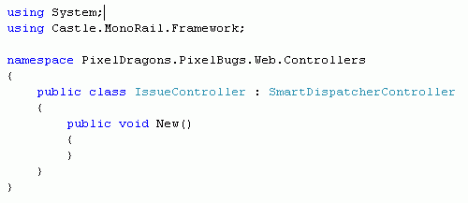
Obviously, this doesn’t even build as we don’t have an IssueController, so let’s add that and the code required to pass this test:
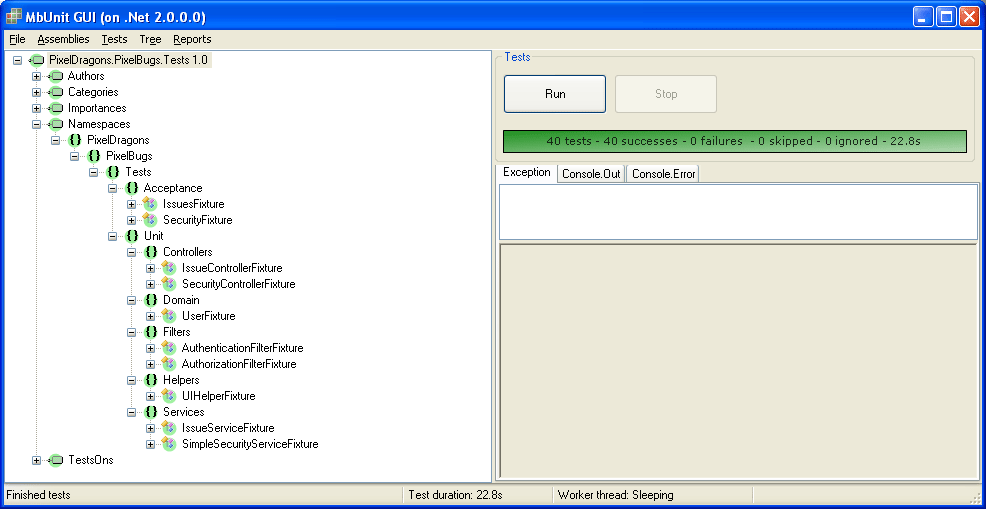
The build now succeeds and the test passes. Wahoo! So what have we done? The test fixture contains a single test that creates the controller and calls the PrepareController base class method which mocks the services that a controller relies on during normal operation. We then call the New() action and verify that the correct view was selected for rendering. Pretty simple.
We then created the required IssueController and added an empty New() method (the action). That’s it! MonoRail will automatically select the view file to render based on the controller and action names which is enough to pass this test. You can of course override this if required using the RenderView() method. MonoRail knows which controller action to call based on the url of the requested page, so http://localhost/Issue/New.ashx will route through to the Issue controller and New action. There is a standard set of action names that I use for various crud tasks:
New – Shows a form to the user for entering information about the entity to create.
Create – The New view should post it’s form to the Create action. This action will persist the entity and redirect to the next view (normally an entity list or confirmation page).
Edit – Like New, but is used to show a form for editing an existing entity. May use a view component to hold the comment UI between this and the New view.
Update – Like Create, but this is where the Edit view should post it’s form. This action will persist the entity changes and redirect to the next view (normally an entity list or confirmation page).
List – Shows a list of entities
Index – A general home page for the controller, like an overview or summary etc
Delete – Deletes a given entity and redirect to the next view (normally an entity list or confirmation page).
Obviously we can add others where required, but this is the standard I stick to for these tasks.
Back to our code, there is something missing. The eagle eyed amongst you will notice that we haven’t created a view for the New action. So, lets fix that now, with an acceptance test to start with, we’ll be using WatiN for acceptance testing (click for full size):

The url is hardcoded for now in the test, we’ll address this later. Running this test fails, the error message shows us that we haven’t registered the IssueController with Windsor, so lets do that and add the view file next and see what happens to the test:

It passes! To be honest there where a couple of other minor things that I had to do to make the test pass. I first added an entry in the Controllers.config file for the IssueController and added the view file. But I also needed to modify the default layout to render the page title and add the layout and rescue attributes to the IssueController. Here is the layout, notice the $!title variables (click for full size):

In the view file, we use the capturefor component to set the $title variable that is picked up in the layout. Here is the view file (Views\Issue\New.vm):

Now this isn’t much of a “New Issue” view as there isn’t a form to collect the information about the issue. We’re going to be developing in small increments so let’s just add summary and description fields and a submit button. Our acceptance test now looks like this (click for full size):

Of course, this test fails so we now need to make some changes to the view to make it pass (click for full size):

The acceptance test now passes and if you take a look at this page in your browser you will see the form (without any css styling yet) and you can interact with it. The form has client-side validation thanks to the validation library that we have included. The validation works based on the class you set for the given fields. There is a whole set built-in or you can create your own.
That’s cool, next on the list is the Create action. So as before, let’s start with a new unit test:

Again, this test didn’t build, so I had to add a number of new things. Firstly the Issue domain class has been added to the Core assembly. It has three properties: Id, Summary and Description. I’ve also added the relevant ActiveRecord attributes. One controversial decision is to use Guid’s as the primary key type. I know most (if not all) of the samples I’ve seen use int’s, but I have been involved in a number of projects and Guid’s have helped a lot to avoid conflicts is various scenarios. I guess this topic will raise some comments so I’ll leave it there for now. Here is the Issue class:

I’ve also added a new interface, IIssueRepository which implements IRepository. Where does IRepository come from? Enter PixelDragons.Commons. IRepository is based on the excellent Rhino.Commons IRepository but I’ve modified it to suit my needs. PixelDragons.Commons is a new assembly that I’ve added to the solution that I’ve used in other projects, more on this later.
The last thing to add is the Create action and IssueRepository property in the IssueController. I’ve added that and the code inside it to pass the test. The IssueRepository will be injected by Windsor during normal running of the application rather than set as it is in our test. Here is the IssueController after these changes:

Running this test fails unexpectedly, so what is the problem. Take a look at the error:
Message: The action did not redirect correctly Equal assertion failed: [[/Issue/List.rails]]!=[[/Issue/List.ashx]]
I see, the url extensions don’t match. We are using ashx, but rails is the default. I spent some time trying to workout how to override this. I couldn’t see a nice clean property or constructor parameter so I ended up adding the following to the test fixture (click for a larger version):

I’m not in love with this and I can see some refactoring coming in the way of a new test base class, but it’s ok for now. After running the tests again, they all pass:

That feels like a good place to leave it for now. Next time we’ll add an acceptance test for creating an issue and maybe start looking at the issue list.
Again, just to reiterate, I’m no TDD expert so if I’m doing anything wrong feel free to comment. This is as much a learning exercise for me as anything. I’ve committed the latest code and you can get it here:
Url: http://code.google.com/p/pixelbugs
Svn Revision: r5
Filed under: Issues | 2 Comments »